How to Add Subtitles to a Video for Free, Step by Step
Add subtitles to any video for free: make timed captions from a transcript, check reading speed and line length, then export SRT or VTT or burn them in.
In this article
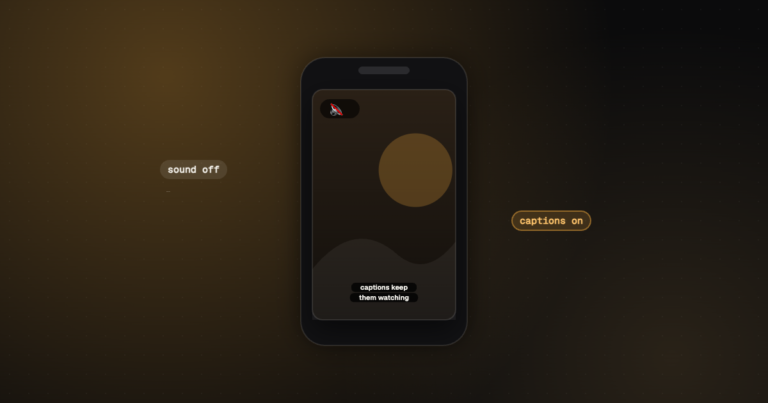
You’ve finished the video. It looks great. Then you watch it on your phone, on mute, on a train, the way most people will, and realize nobody is going to know what anyone is saying. Subtitles fix that. Here’s how to add subtitles to a video for free, step by step, without installing anything or putting a watermark on your work.
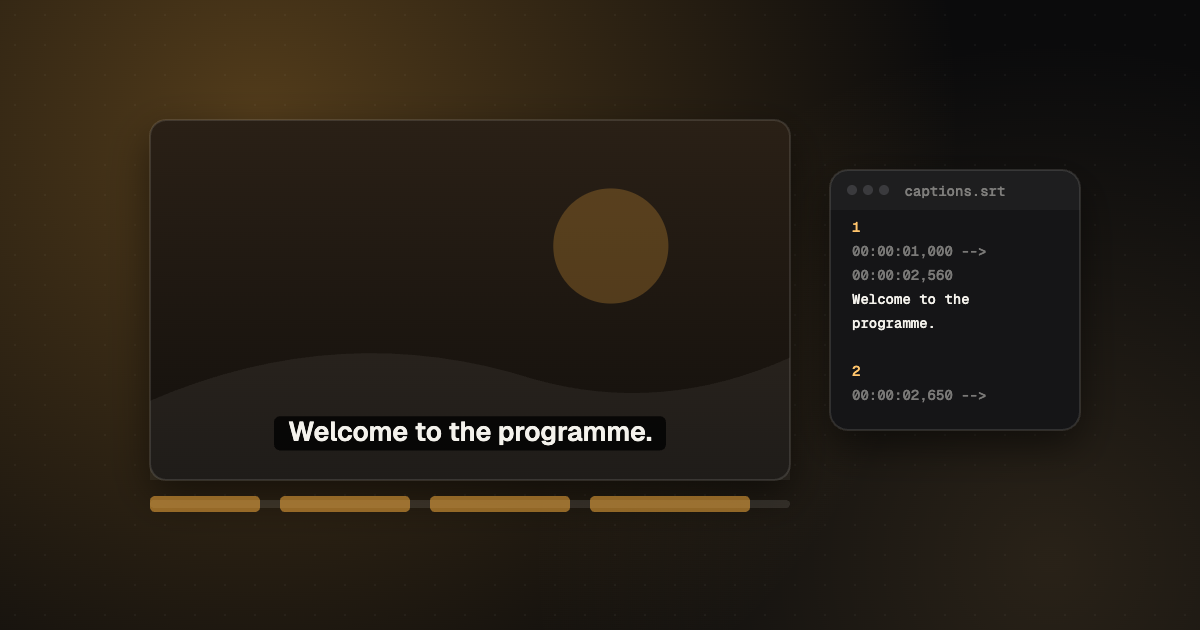
To add subtitles to a video for free: get a transcript, turn it into timed captions, check line length and reading speed, then export an SRT or VTT file and upload it to YouTube, Vimeo, LinkedIn or your video player. For Instagram, TikTok or Shorts, burn the subtitles into the picture instead.
Two kinds of subtitles: files and burned-in
Before you start, decide where the video is going. That single choice decides the whole workflow.
| Subtitle file (closed captions) | Burned-in (open captions) | |
|---|---|---|
| What it is | A separate .srt or .vtt file the player shows on top of the video | Text drawn into the video picture itself |
| Viewer can turn it off | Yes | No |
| Can fix a typo later | Yes, upload a new file | Only by exporting the video again |
| Search engines can read it | Yes, on platforms that index captions | No |
| Best for | YouTube, Vimeo, LinkedIn, websites, courses | Instagram Reels, TikTok, YouTube Shorts, ads |
Our advice: make the subtitle file first, always. Even if you end up burning the text in, the file is your master copy. Fixing a spelling in a text file takes seconds; re-rendering a video because “Kubernetes” came out as “Cuban eighties” does not.
What you need before you start
- The video, or just its audio.
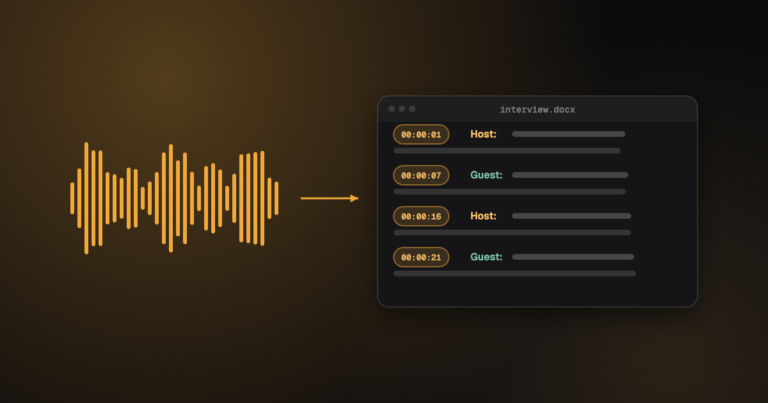
- A transcript, or a way to make one. If you don’t have one yet, our guide on how to transcribe audio to text covers the free and paid options.
- A caption editor that can time the text, split it into readable lines and export a file. A browser-based one saves you installing desktop software.
How to add subtitles to a video for free, step by step
We’ll use the free CadreScripts editor for the examples because it runs in your browser and needs no account for any of these steps. The same steps apply to any decent caption editor.
- Open the video and your transcript. In the editor, choose Open media for the video and Import document for the transcript (Word, .txt or .html). If you already have a caption file from YouTube or another tool, import that instead: SRT, WebVTT, TTML, DFXP, SCC and SBV all open.
- Switch to Captions mode and create captions from the transcript. The editor splits the text into captions using its timings. If your transcript has timestamps, the captions are timed between them.
- Choose a rule set. Pick Netflix (adults or children), US broadcast or Custom. Netflix’s adult rules, for example, allow 42 characters per line and two lines per caption.
- Fix the warnings. The Checks tab lists captions that are too long, too fast to read, too short on screen, overlapping or missing a speaker name. Many have a one-click Fix.
- Play it through once. Watch with the captions on, at normal speed. Your eyes will catch what the checks can’t: a line break in the middle of a name, or a caption that appears before the person speaks.
- Export. SRT for most platforms, WebVTT for websites, and the others if a broadcaster or Netflix-style delivery asks for them.
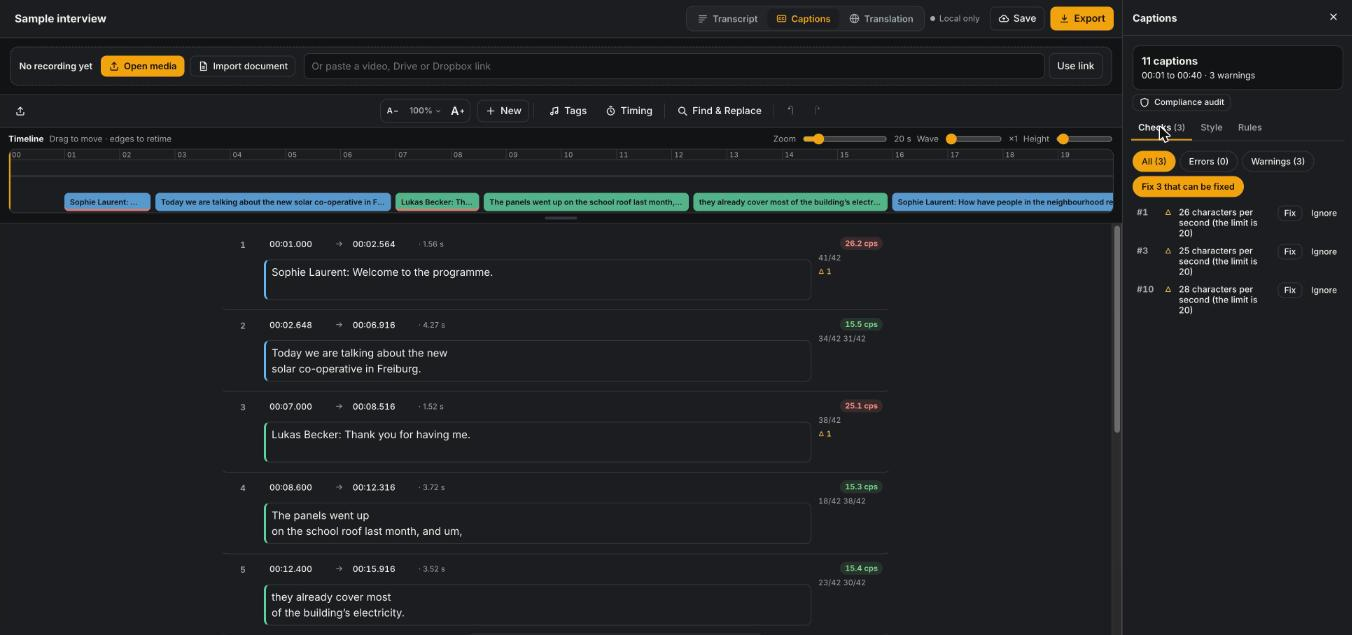
Open the editor, click “Try it with a sample transcript”, then switch to Captions. You’ll have timed, rule-checked captions in under a minute, without signing up.
No transcript? Three ways to start
Not everyone starts with a neat transcript. Here are your options, from cheapest to fastest.
1. Type the captions as the video plays
For a short clip, you can write captions from scratch. In Captions mode, choose “Start with an empty caption”, play the video and use the keys: F4 sets a caption’s start, F8 sets its end, and Ctrl+Enter starts a new caption. It’s slower than working from a transcript, but for a 60-second promo it’s perfectly manageable.
2. Download the automatic captions and fix them
If the video is already on your own YouTube channel, it may have automatic captions. Download them, import the file into a caption editor and correct the names and terms. Signed-in editor users can import captions straight from their own channel.
3. Transcribe the recording, then build captions
For anything longer than a few minutes, get a transcript first. An AI transcript takes minutes (in our editor, about two minutes for an hour of audio, with an account), then captions are built from its word timings. If accuracy matters more than speed, a human transcript gives you a cleaner starting point.
Subtitles in another language
Once your captions are right in the original language, translating them is the easy part, as long as you keep the timing and check the result. Translated subtitles are often longer than the original (German and Spanish usually run longer than English), so re-check line length and reading speed in the new language after translating.
Signed in, the CadreScripts editor translates captions into 75 languages, keeps italics and positions, re-wraps lines to the new language’s limits and flags rows that need a second look, such as a number that changed or a name left out. For publication, have a native speaker check it, or order human translation.
How long does it take?
Rough numbers from caption work, for a clear 10-minute talking-head video:
| Starting point | Typical time to finished subtitles |
|---|---|
| Checked transcript with timestamps | 10 to 20 minutes |
| Automatic captions to correct | 20 to 40 minutes |
| Nothing: type captions from scratch | An hour or more |
Fast speech, several speakers and technical terms push those times up. So does perfectionism, which, to be fair, is what subtitles deserve.
Getting the timing right
Good subtitles are mostly about timing, not words. A caption that’s correct but appears half a second late feels wrong to every viewer, even if they can’t say why.
Reading speed
Reading speed is measured in characters per second (cps). If a caption has more characters than a viewer can read in the time it’s on screen, they miss the end of it and stop trusting your subtitles. Netflix’s adult rule set uses 20 characters per second; children’s programs use a slower limit. The editor shows the cps beside every caption and flags the ones over the limit.
Minimum and maximum time on screen
Very short captions flash past; very long ones sit there awkwardly after the person has finished. Rule sets give a shortest and longest duration, and the gap between captions in frames, so they don’t flicker.
When the timing is off across the whole video
If every caption is two seconds late (common when a video was trimmed after captioning), don’t fix them one by one. Use Timing → Move times earlier or later for everything at once, or Sync with two points: put the first and last captions where they belong and the rest follow. There’s also a free subtitle timing shifter if you only need that one job.
Check one caption near the start and one near the end. If both are late by the same amount, shift everything. If the delay grows through the video, it’s a frame rate mismatch: use “Change the frame rate” instead (for example 23.976 to 25).
Making subtitles easy to read
Viewers forgive a lot, but not subtitles they have to work to read. A few habits make a big difference:
- Break lines at natural pauses. “She said the panels / went up last month” is harder to read than “She said the panels went up / last month”.
- Keep names and numbers together on one line.
- Show who is speaking when it isn’t obvious: a name label, or a dash at the start of each speaker’s line when two people share a caption.
- Use italics sparingly, for off-screen voices, songs or emphasis.
- Move captions up when the bottom of the picture has text or faces. Netflix’s guidance is to place them at the top in those moments.
For deaf and hard-of-hearing viewers, add sound tags such as [laughter], [applause] or ♪ for music. These turn ordinary subtitles into SDH captions. In the editor, F9 opens a menu of tags you can drop in.
Exporting: which subtitle file format to choose
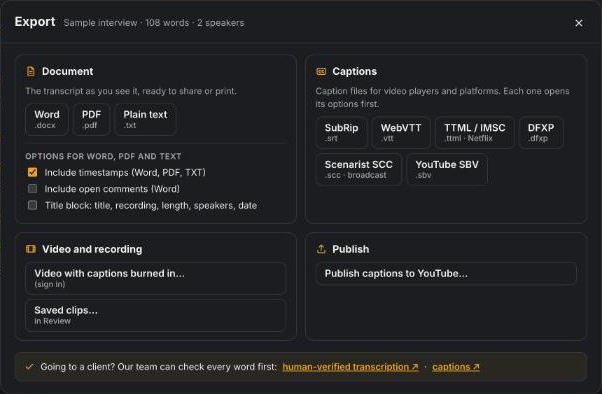
| Format | Use it for |
|---|---|
| SRT (.srt) | The safe default: YouTube, Vimeo, LinkedIn, Facebook, most video editors |
| WebVTT (.vtt) | HTML5 video players on websites and course platforms |
| TTML / IMSC (.ttml) | Netflix-style and streaming deliveries |
| DFXP (.dfxp) | Some older players and platforms |
| Scenarist SCC (.scc) | US broadcast television |
| YouTube SBV (.sbv) | YouTube’s own older format |
Need to switch format later? The free SRT to VTT converter, VTT to SRT converter and subtitle converter do it in your browser.
Adding the subtitle file to each platform
YouTube
In YouTube Studio, open the video, go to Subtitles, choose the language and upload your file with timing. Upload a file even if YouTube has made automatic captions: yours will be accurate, and the automatic ones often aren’t on names and jargon. Signed-in editor users can also publish captions straight to a video on their own channel from Export → Publish captions to YouTube.
Vimeo, LinkedIn and Facebook
All three accept an SRT file in the video’s settings when you upload or edit it. Name the language correctly so viewers can pick it.
Your own website or course
Use a WebVTT file with the HTML5 video player, or upload it to your course platform’s caption setting. Check it on a phone, where long lines wrap badly.
Instagram Reels, TikTok and Shorts
These apps mostly show captions only if they’re part of the picture, so burn them in. Plan for the vertical 9:16 shape and keep text out of the areas where the app puts its buttons and descriptions.
Burning subtitles into a video
Burned-in subtitles are part of the video for good, so get the file right first. Then choose a style that’s readable on a small screen: a clear sans-serif font, a dark box or outline behind the text, and a size big enough to read at arm’s length.
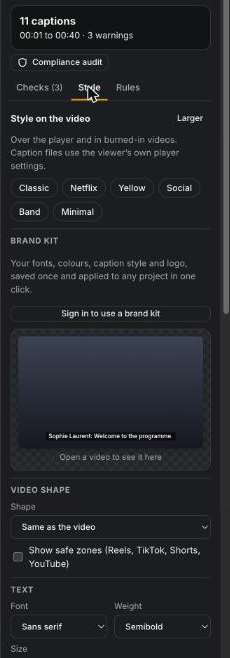
In the CadreScripts editor, the Style panel has presets (Classic, Netflix, Yellow, Social, Band, Minimal), video shapes including 9:16 portrait, and safe-zone guides for Reels, TikTok and Shorts. Exporting a video with the captions burned in is made in your browser, so nothing is uploaded, but it needs a signed-in account. If you don’t have one, export the SRT and burn it in with your usual video editor.
Free automatic captions vs checked captions
Automatic captions are a good start and a poor finish. They get most words right on clear speech and fall over on exactly the words that matter: names, brands, numbers and anything technical. They also rarely follow line-length or reading-speed rules.
That’s why the workflow above starts from a transcript you’ve checked. If captions have to be right first time (a broadcast, a paid course, a public body that must meet accessibility rules), it’s worth paying for people to do it: our human-verified captions start from $1.30 a minute, and subtitles with translation from $4.00 (see pricing).
Captions also matter legally for some organizations. In the US, public bodies covered by ADA Title II have deadlines to caption video; the free caption compliance checklist sets out the rules and dates. It’s guidance, not legal advice.
Common subtitle mistakes (and quick fixes)
| Mistake | Fix |
|---|---|
| Captions drift later and later | Change the frame rate, or sync with two points |
| Walls of text, three or four lines | Re-wrap to two lines of 42 characters or fewer |
| Captions cover a name on screen | Move that caption to the top |
| Nobody knows who’s speaking | Add name labels or dashes for speaker changes |
| Auto-caption errors on names | Add names to a glossary, then Find & Replace |
| Burned-in text hidden by app buttons | Turn on safe zones before exporting |
Frequently asked questions
How can I add subtitles to a video for free?
Make or import a transcript, create timed captions from it in a free caption editor, fix the reading-speed and line-length warnings, and export an SRT file. Upload that file to your video platform, or burn the captions into the picture for social apps.
What’s the difference between captions and subtitles?
People use the words loosely. Strictly, subtitles assume the viewer can hear and show only dialogue, often translated; captions also describe sounds for deaf and hard-of-hearing viewers. SDH subtitles combine both.
Can I add subtitles without a watermark?
Yes. A subtitle file never carries a watermark, and making, editing and exporting caption files in the CadreScripts editor is free.
Which subtitle format is best?
SRT works almost everywhere and is the best default. Use WebVTT for website players, and SCC or TTML only when a broadcaster or streaming platform asks for them.
How many characters should a subtitle line have?
Around 42 characters per line and no more than two lines is the common standard for English, as in Netflix’s rules. Shorter is fine; longer lines get hard to read, especially on phones.
Your next step
Got a video waiting? Try it free in your browser: import your transcript or caption file and have checked subtitles in minutes. If they need to be right first time, get human-verified captions from our team.