How to Remove Background Noise From Audio (and When to Hand It Over)
How to remove background noise from audio: capture a noise profile, apply gentle noise reduction in Audacity, and know when noisy audio needs an editor.
In this article
You hit play on the interview you recorded in a hotel room and there it is: the air conditioner, humming under every word like a bored backing singer. Good news first. Steady background noise is the easiest kind to remove from audio. Here’s how to do it yourself, and how to tell when a recording needs a person instead.
To remove background noise from audio, capture a few seconds of the noise on its own, let a noise reduction tool learn it, then apply a gentle amount to the whole track. In Audacity that’s Effect › Noise Reduction › Get Noise Profile, then Reduce. Steady hums and hiss clean up well; traffic, wind and other people talking usually need hands-on repair.
What kind of noise do you have?
Before you touch a slider, name the noise. It decides everything that follows.
| Noise | Examples | DIY result |
|---|---|---|
| Steady (broadband) | Air conditioning, computer fans, room tone, tape hiss | Usually good |
| Tonal hum | Electrical hum and its harmonics, fridge buzz | Good with a notch filter or de-hum |
| Changing | Traffic, wind, a café, rain on a window | Hit and miss |
| Sudden | Clicks, mouth noise, a dropped mug, a door | Fixed one by one, not with noise reduction |
| Other voices | A TV, a colleague on a call, crosstalk | Hard; needs specialist tools |
How to remove background noise in Audacity (free)
Audacity’s Noise Reduction effect works by learning what your noise sounds like, then turning that sound down everywhere. The steps below follow the Audacity manual.
- Work on a copy. Duplicate the track (or save the project under a new name) so the original stays safe.
- Find a gap with only noise. A pause before someone speaks is ideal. Audacity needs at least about 0.05 seconds, but a second or two gives it a better picture.
- Get the noise profile. Select that gap, open Effect › Noise Reduction and click Get Noise Profile. The window closes; that’s normal.
- Select everything you want cleaned. Usually the whole track.
- Set it gently. Open Noise Reduction again. The defaults are 6 dB of reduction, sensitivity 6 and frequency smoothing 6. Start there.
- Preview, and listen to the Residue. Choose Residue and press Preview to hear only what will be removed. If you can make out words in it, the settings are too strong.
- Reduce. Switch back to Reduce and click OK. Listen on headphones, then on your phone speaker.
Push it too far and you swap one problem for a worse one: watery, chirpy “musical noise” and voices that sound like they’re underwater. The Audacity manual itself warns that those artifacts can be more annoying than the original noise. Two light passes beat one heavy one.
Other ways to clean up noisy audio
A hum or buzz: use a notch filter or a de-hum effect at the hum’s frequency instead of broadband noise reduction. It removes the tone and leaves the voice alone.
Clicks and mouth noise: a de-click effect, or zoom in and cut or redraw the click by hand. Noise reduction won’t touch them.
Low rumble: a high-pass filter around 80 Hz takes out traffic rumble and desk bumps without thinning a voice.
Room echo: echo isn’t noise, it’s the room. A de-reverb tool can help a little, but the real fix happens before recording: soft furnishings, a smaller room, the mic closer to the mouth. Our 10 recording mistakes that editing can’t fix covers the rest.
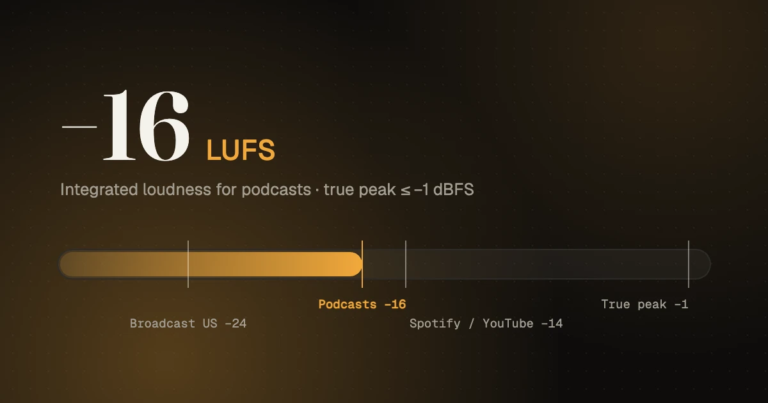
Clean the noise before you raise the level. Loudness processing lifts the noise along with the voice. Remove noise, edit, then bring the episode up to −16 LUFS at the end.
When to hand it to an audio editor
DIY noise reduction is a great tool for steady noise and a frustrating one for everything else. Send it to someone when:
- the noise changes all the time (street, wind, café, rain);
- another voice or a TV sits under the speaker;
- the speaker is quiet and close to the noise level, so every cleanup pass damages the voice;
- it’s an interview you can’t re-record, and it has to sound right.
Our audio cleaning and restoration team works on noise, hum, hiss, echo, clicks and levels by hand, track by track. Basic clean-up starts at $1.25 a minute and advanced restoration at $1.60 a minute (current pricing). You can hear real before-and-after examples on our samples page.
- Audio converter: turn MP3, M4A, FLAC or video into WAV before you edit, so you aren’t re-compressing a compressed file.
- Audio and video cutter: trim the dead air off the ends without losing quality.
All free in your browser, with nothing uploaded and no sign-up.
Frequently asked questions
Can you remove background noise from a video?
Yes. Pull the sound out of the video (the audio converter above does this), clean it, then put the cleaned audio back in your video editor in place of the original.
Why does my voice sound robotic after noise reduction?
The reduction is too strong, or the noise sample didn’t match the rest of the track. Lower the reduction and sensitivity, take a longer noise sample, and try two lighter passes.
Can noise be removed completely?
Steady noise can usually be brought down until nobody notices it. Removing every trace tends to damage the voice, so editors aim for “unnoticeable”, not “silent”.
Is there an AI tool that removes noise in one click?
Several speech-enhancement tools do, and they can be impressive on simple recordings. On tricky audio they can also change how a voice sounds, so listen carefully before you publish.
Sources, checked 12 November 2026: Audacity, Noise Reduction (Audacity manual).